 If you have kids or are having the grandchildren over for Thanksgiving this turkey craft is a fun way to keep them entertained while the cooking is getting done. The instruction are provided below. The 2nd Grade teacher who posted this craft on her website included a photo for each step, which is a helpful guide for children and adults. The step by step photo demonstration can be found by clicking here. Enjoy watching the kids create their coffee filter turkeys while you enjoys some Sasquatch Coffee and gobble on.
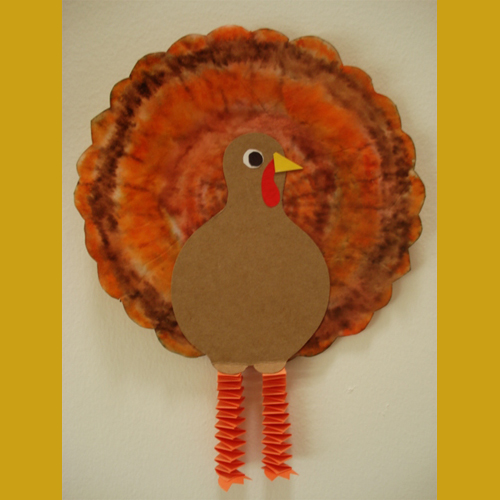
Fold Coffee Filter in half, then half again. Cut a scalloped edge to respresent the feathers.
Students roughly colour in the filter with waterbased markers. Encourage the students to really colour in the filter well, in order to get a bright finished product. Then I just walked around and sprayed each one a couple of times with a water mister. The colours will bleed and blend together.
Draw and cut out a simple turkey body shape out of brown paper or the inside of a cereal box.
There are two ways to create the legs: spring type, which are more difficult, and a simpler accordion fold. Decide which works best for your students- I did the accordion fold with Grade 2 students.
For the spring-y legs, glue two long strips of paper together to form a “L” shape. box.Then alternate folding each strip over the other until you reach the end. Glue the end together.
You can also make accordion fold legs. Glue these onto the turkey body (the spring legs are more tricky to glue on- I recommend a glue gun for them, or use a paper-clip to help attach them to the body with white glue while they dry.) Cut out two feet from orange paper and glue them to the ends of the legs.
Glue on a paper beak, eye and red dangly thingy (aka: wattle).Finally, glue the body onto the coffee filter. Ta da!
SRC: Check out the step by step photo instructions for this Coffee Filter Turkey at: afaithfulattempt.blogspot.com/search?updated-max=2011-11-20T17:24:00-07:00&max-results=7